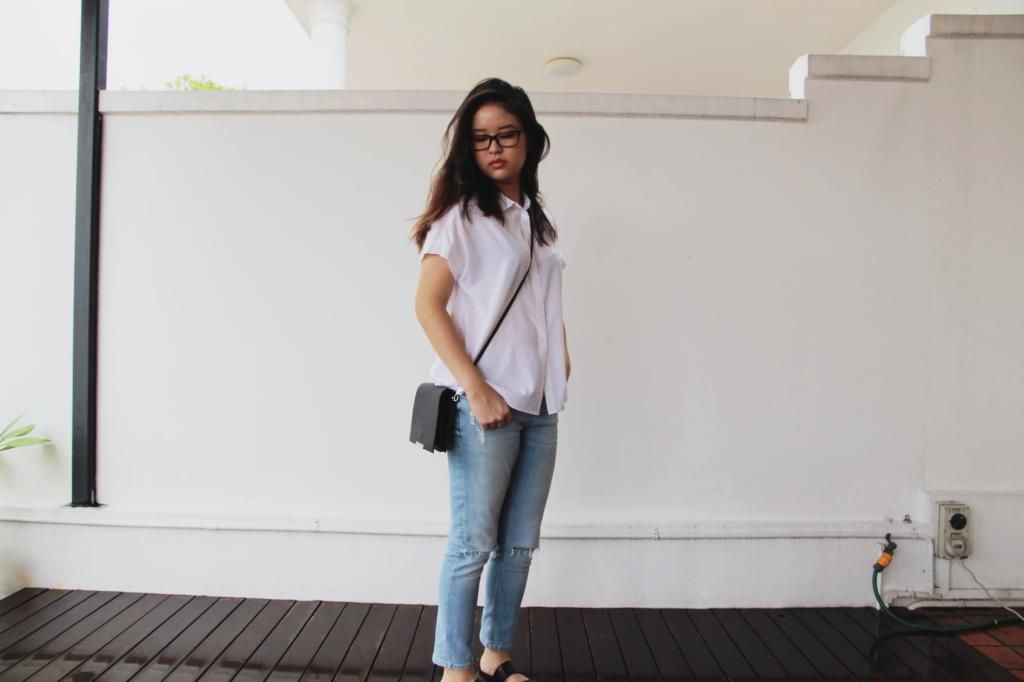
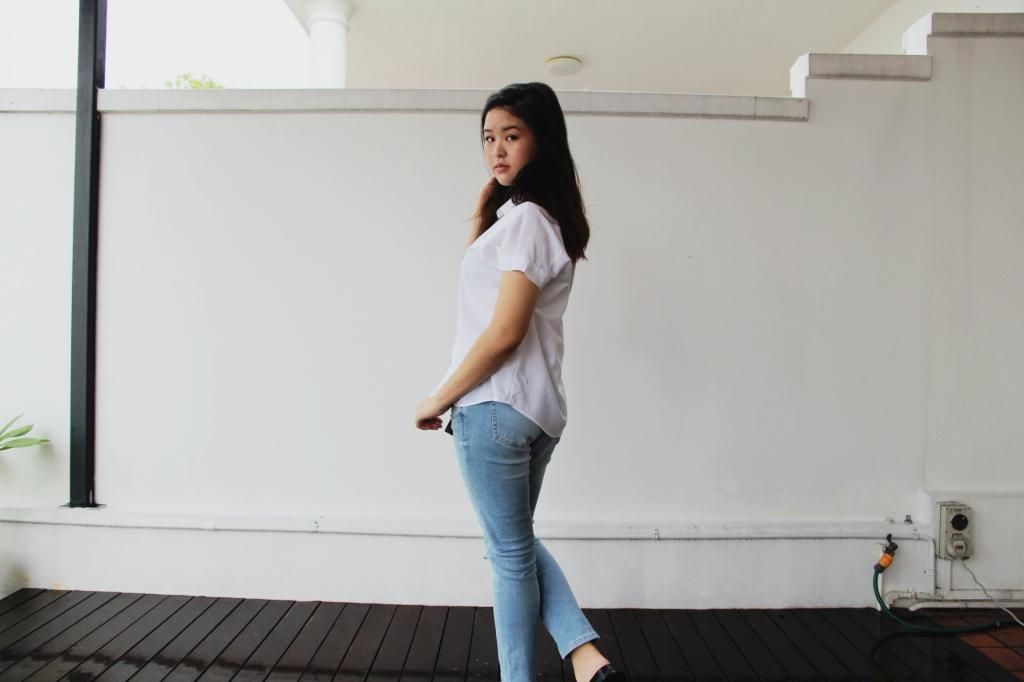
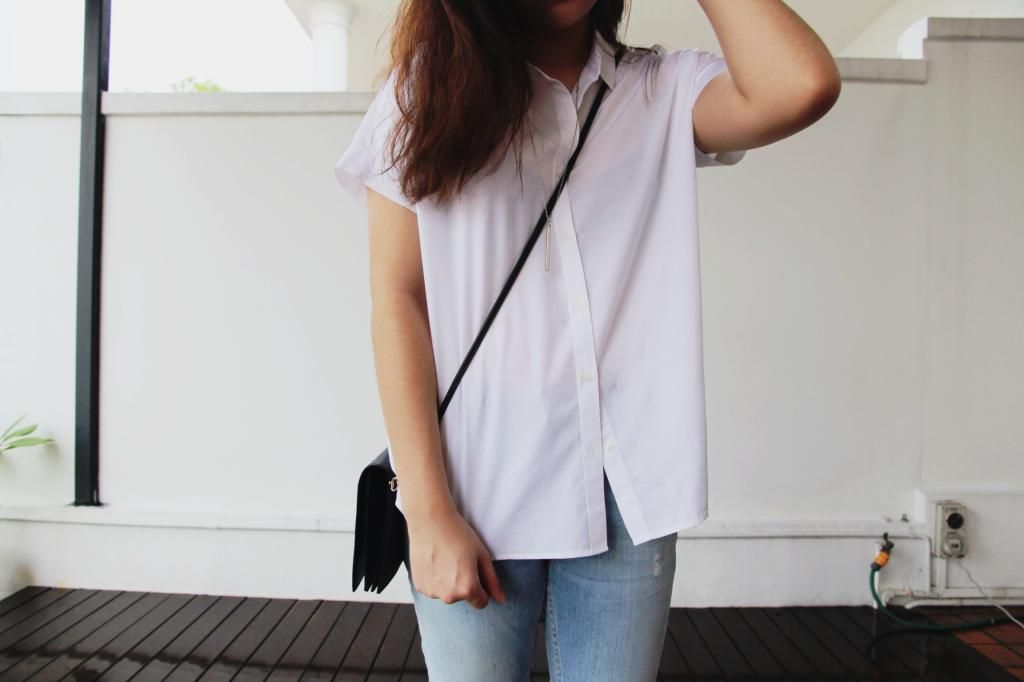
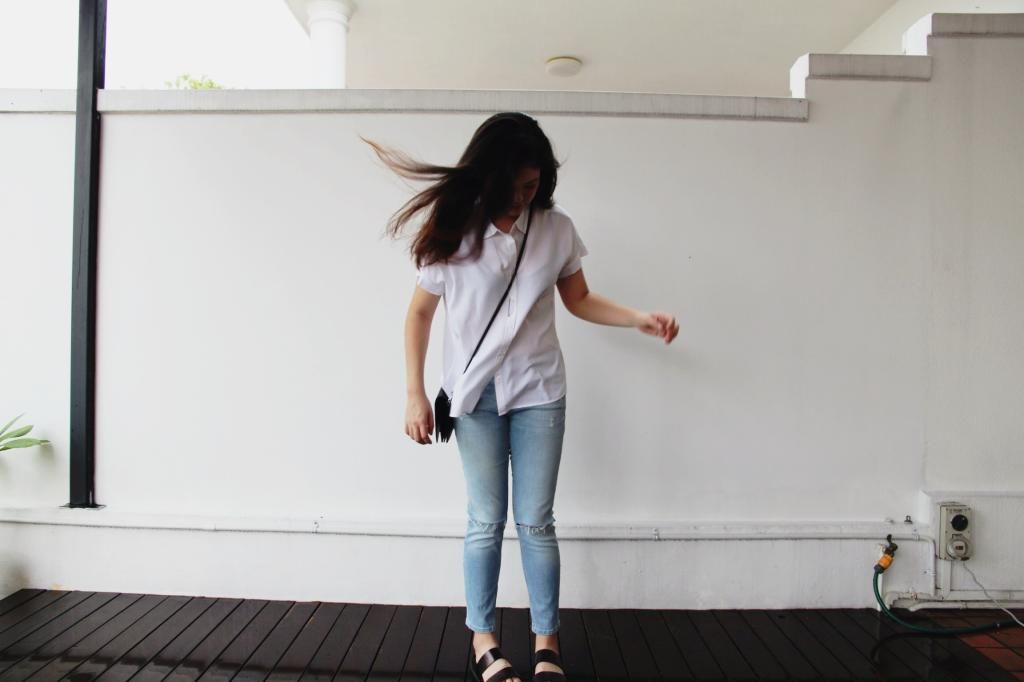
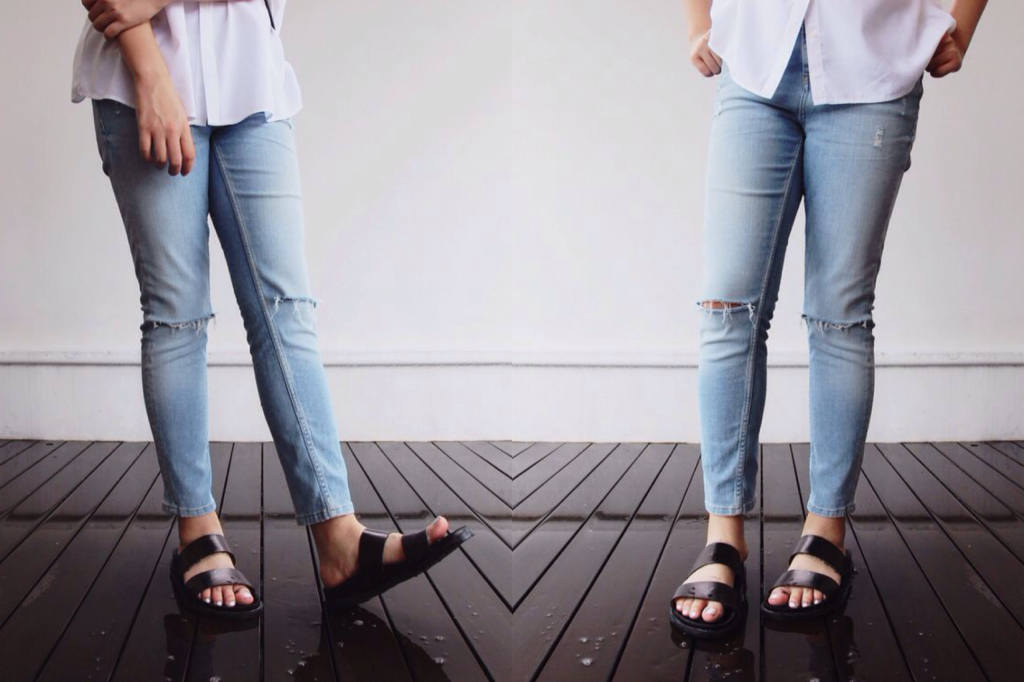
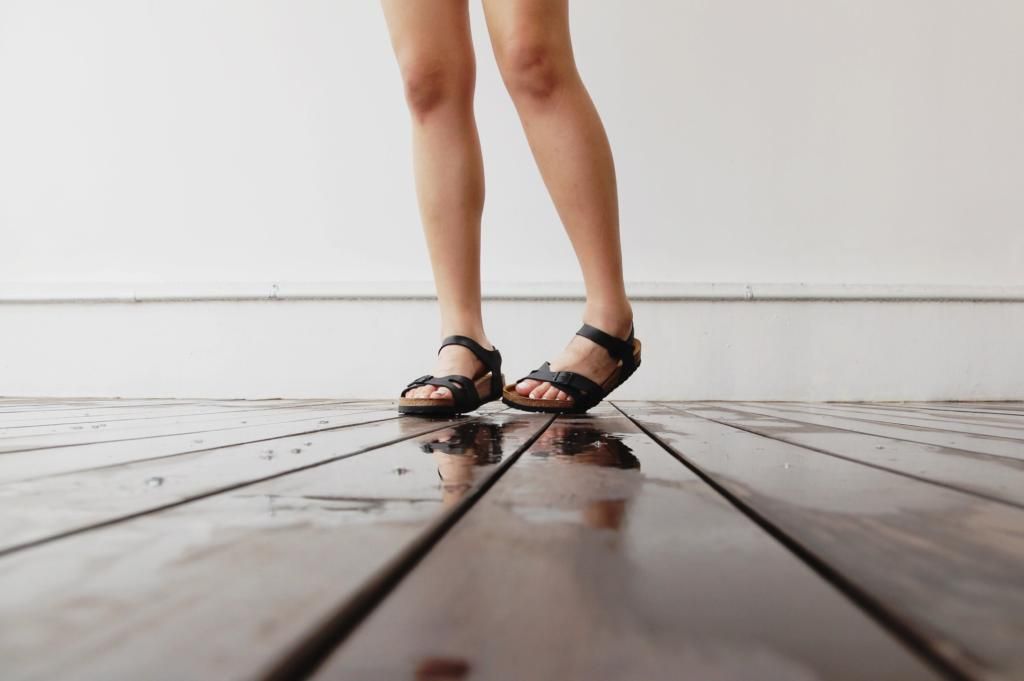
Pages

25.12.14

DIY full moon clock

 photo D54A7471-5F43-467E-A47A-BF34E251640C.jpg

 photo 67737FC4-F0C0-4658-9392-E75388C8FC64.jpg

what you will need:

  • clock ($1.50 from ikea!)
  • picture of the moon roughly the size of the clear plastic face of the clock with the center marked out on the computer
  • cardboard
  • strong glue
  • paint/nail polish
  • pencil,scissors, penknife 
  • cutting board


1. dismantle the clock

 photo 0A3010A7-565D-452B-AE56-1EDD228C660E.jpg

2. mark the center of the plastic case using the marked out paper that comes with the clock

3. align the middles of the case and the moon. trace and cut out the moon shape so it is the same size as the case (note: the moon cutout is supposed to lie on top of the rim of the case so you shouldn't use the paper from the clock as a stencil)

 photo 767DF50A-0DCF-470D-97A5-F624E8C2305C.jpg

4. repeat the step with the cardboard so you will be left with 3 circles of the same size

 photo E51D915B-B718-413D-BB44-2DD255A6C671.jpg

5. punch holes through the centers of the moon and the cardboard

6. glue the cardboard to the back of the moon (yes i used an old pizza box)

 photo 06020A15-41DD-4A21-AEED-7AB7343C527E.jpg  photo 21F7097D-EF9F-4108-B10A-FAC0333010FA.jpg  photo 9BCCE731-49BB-4FF8-8639-276E145C4DE6.jpg

7. paint the clock hands with your paint/ nail polish of choice and let it dry

8. assembly time! glue the clock motor to the back of the cardboard. fit the clock hands back in and glue the plastic case to the cardboard (don't forget to add a battery first!)

 photo 9E432AA2-0652-424E-9A83-F113E435C07D.jpg

 photo 0BFD0641-67FC-4B77-B9BE-A5708E307465.jpg

 photo F3DCC775-4A31-4CD2-8513-D11F218E2D3A.jpg

16.12.14

t3

 photo IMG_8623_zps7cf20d68.jpg

happy december everybody! we're finally done with our exams (thank God) and we do hope to be on here more often, with more adventures (adventudrielle?) and crafting (craftdrielle?) posts.

 photo IMG_8649_zps55f216fc.jpg
 photo IMG_8640_zps31ebabfd.jpg

candy
sunnies Cotton On, oversized tank Cotton On, camo shacket UO, shoes ASOS

 photo IMG_8620_zps0959fd4b.jpg
 photo IMG_8630_zps2b63cac2.jpg
 photo IMG_8628_zpsf8af79a3.jpg

gabi
hat Å land, top MONKI, culottes Editor's Market, shoes Adidas Originals, bag Mansur Gavriel

 photo IMG_8643_zpsccbe3858.jpg
 photo IMG_8648_zps60dbf548.jpg
 photo IMG_8642_zpsfcae13ca.jpg
 photo IMG_8639_zps92bab279.jpg photo IMG_8644_zps14795f1f.jpg
 photo IMG_8624_zps92af9a6a.jpg
 photo IMG_8645_zps0876071a.jpg

our airport is really quite a beauty and it's both odd and endearing that we don't do "regular" airport things like people in other countries would. our kind of regular includes studying, eating, shopping and now we're adding "taking pictures for our blog" to the list. we love this location for its futuristic edges, glass panels, interlocking lines (and air-conditioned bliss). step out into its decorative gardens for a touch of tropical amidst the cold, clean structural lines of the airport interior.


ending off with this funny gif of gabi kicking my head (not really though)
see y'all real soon with a new post!
xx

14.12.14

DIY shiny macrame hanging planter

 photo 91230298-3448-4249-BE49-0F6B0E1550BA-1.jpg

my passion for cacti isn't a secret on this platform and it has now spread to include air plants! (air plants are the new cacti yeah?) but since acquiring my satisfyingly cheap air plants from daiso in tokyo, i have been struggling to find the perfect home for them. my first thought were the geometric plant cages ubiquitous on pinterest, but alas, most of them are grossly overpriced. then i remembered the equally popular macrame plant hangers once synonymous with hippies and grandmas alike. arguably easier to make (or so i thought. but don't fret! it's still manageable), and requiring more commonly found materials in the average (asian?) home (the glass jars once contained chicken essence with ginseng), i decided to christmasify this project by using shiny silver beads and string as an ode to the festive season that is now upon us. so read on to find out how i did it and enjoy!

you will need:
  • string (i got mine at a random stationery shop)
  • beads (ebay)
  • jar/pot (note that the size of the container makes a difference to how much string you need/ distance between knots)
  • ring (i used an old one from H&M)
  • scissors
  • ruler/ measuring tape
  • cacti/ air plants (daiso in japan) (can be found at cat socrates in bras basah!)
  • patience because it's fiddly work

 photo F050486E-5537-45E8-AA56-8FCCDC6DDE12.jpg  photo 6EA788FF-91DA-4817-9DC6-9011CF27D622.jpg  photo C9D1AF5D-59CB-4C21-9DD5-75E797E5D464.jpg  photo E3D3D25F-55C4-4B0A-830F-F25539755A1E.jpg

1. cut 3, 100 cm strands of string (if your container is bigger, prepare longer string
2. thread the strands through the ring, fold them in half and tie them together in a knot near the top
 photo C188DD38-A678-4AE4-AEC2-C33B8F770734.jpg
3. take a pair of strands and string a bead on them. secure the bead with a knot 1/3 of the way down the strings and repeat with the rest (i used a double knot because of the bead i used and the thickness of the string)
 photo D991CB79-56AF-4D45-8F62-718CCB2592CD.jpg  photo 89CC5D61-A1C9-4148-9AB8-90940C2F848C.jpg  photo 28BB55E4-C5A4-4CCB-AD8E-FAFC35890672.jpg
4. once complete, take a strand each from 2 pairs of string and add a bead onto them and secure with another knot 4 cm down. by the time you're done you should have two loose strands on both sides that you should secure using the same technique as before to create a tube-like shape
 photo E49CB4F7-5860-42A7-8E1E-CC1EC0CA3EC5.jpg
5. depending on the height of your container you can continue with this method so that when you slot your container into the tube, the 'macramed' areas should cover around 3/4 of it
6. grab the remaining string and secure them into a knot at the bottom of the jar and voilà! it is done! 
 photo 190F9695-ACE4-4411-AA06-EC85CA6FED57.jpg

7.7.14

gabi's summer looks

 photo 08AC5BAE-69A6-4353-8A2E-78E689D836F7.jpg  photo D2EB58EC-8CAA-44C8-8E5C-FFFF9D00DCE2.jpg  photo 68C6181C-CF63-4306-847B-73D7D5D64496.jpg  photo 6BD3C9DE-F746-4883-A93D-A945EDF405E7.jpg  photo 090E48B4-CD77-41F5-98BE-6E5715F061F5.jpg
 photo 45315071-5FC9-4C07-85FD-E5C0F768DA2F.png

Look 1:
Top- Uniqlo, Jeans- TOPSHOP New Baxter Jeans, Sandals- Zara, Bag- Monki Peppi, Necklace- Forever 21 + DIY

Ripped jeans have been my jam for the past few months. My new craze has resulted in my acquisition of two Topshop pairs and also an old pair of jeans being at the mercy of my fabric scissors. They give any outfit a "I don't care", "homeless chic" kinda vibe which is evidently what I look for in outfits.  Another blogger cliché this summer is the Birkenstock/slider trend. I had been eyeing the Zara version for the longest time but couldn't justify spending $90 on them so when I saw them on sale I knew they had to be mine. Not sure if you can tell from the pictures, but my pair doesn't fully match the original Zara ones. That's because I actually purchased the light pink pair and dyed them black because 1. they were cheaper than the black ones and 2. the Zara I went to didn't have the black ones in stock. All the effort to dye them was totally worth it because they still look really good and I saved myself like $30 (HELL YEAH)
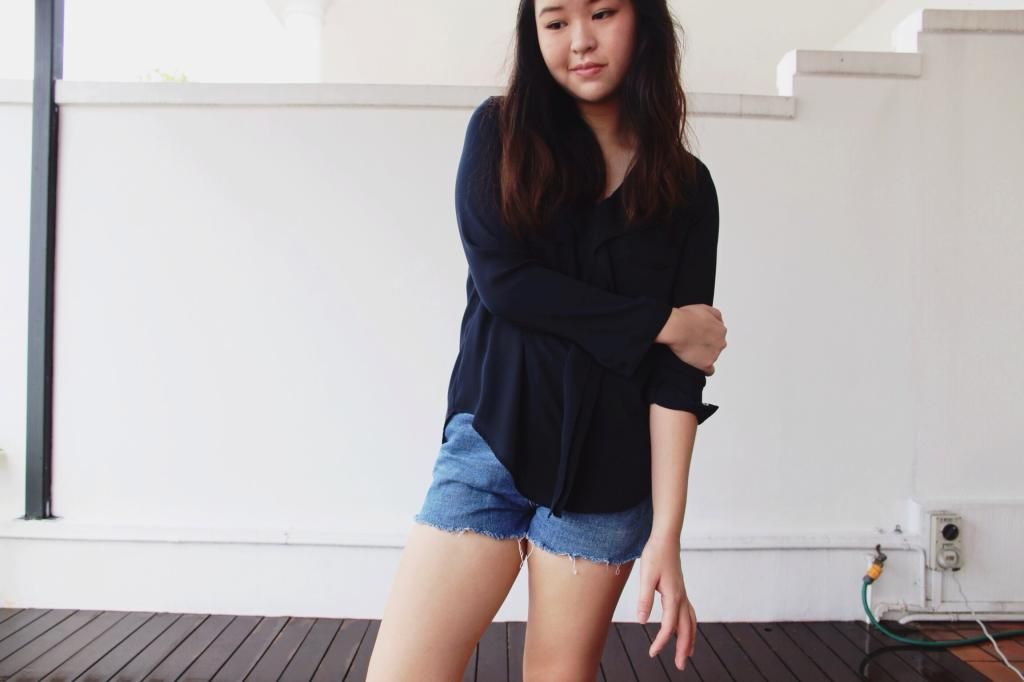
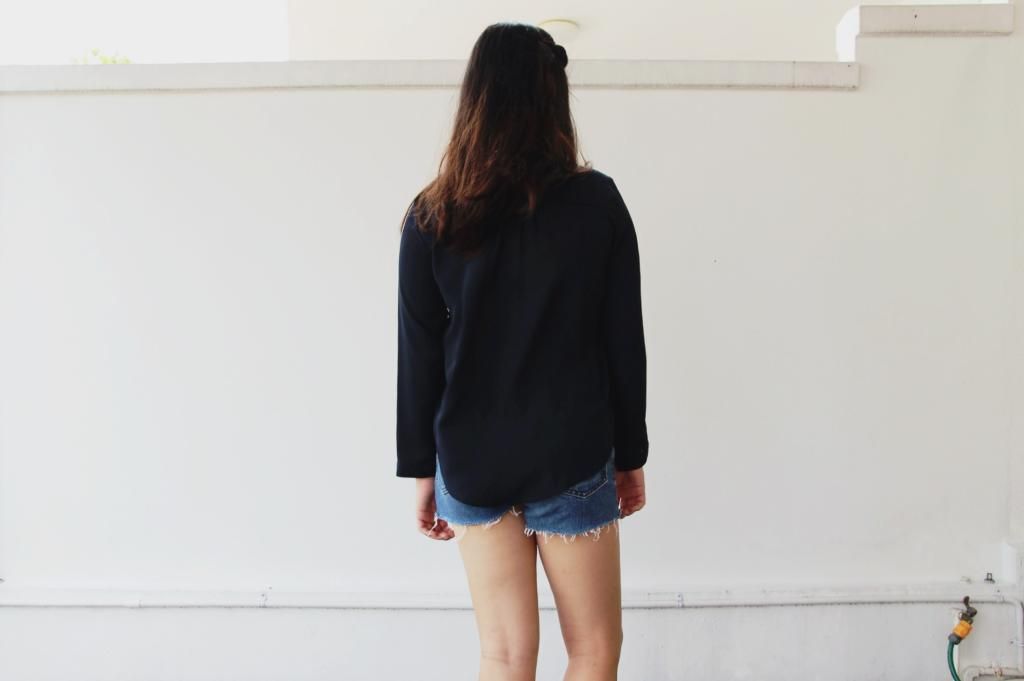
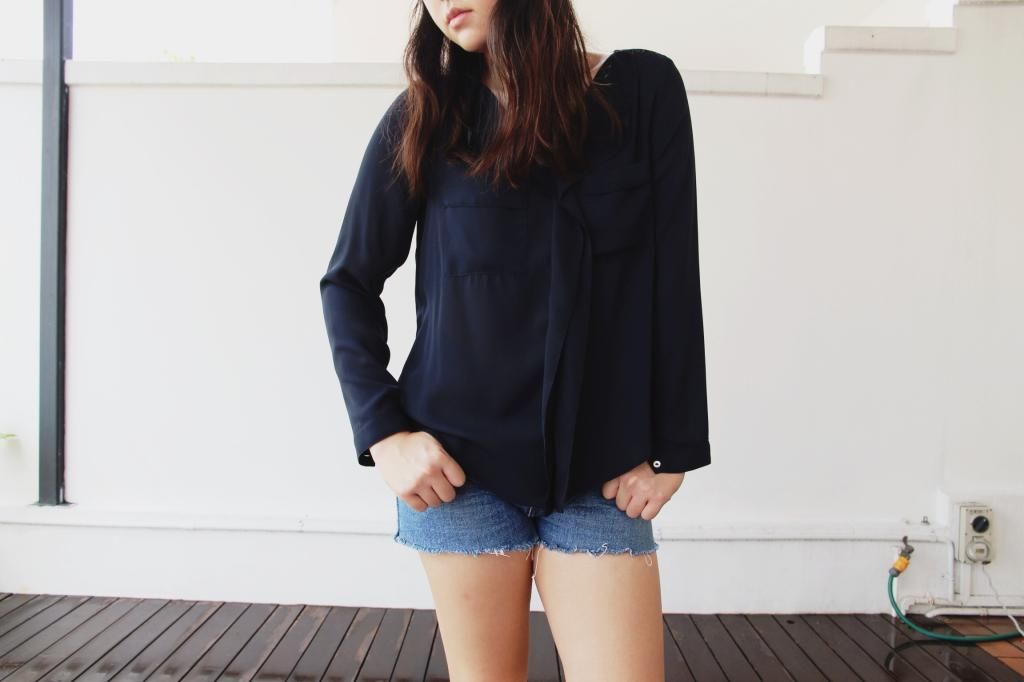
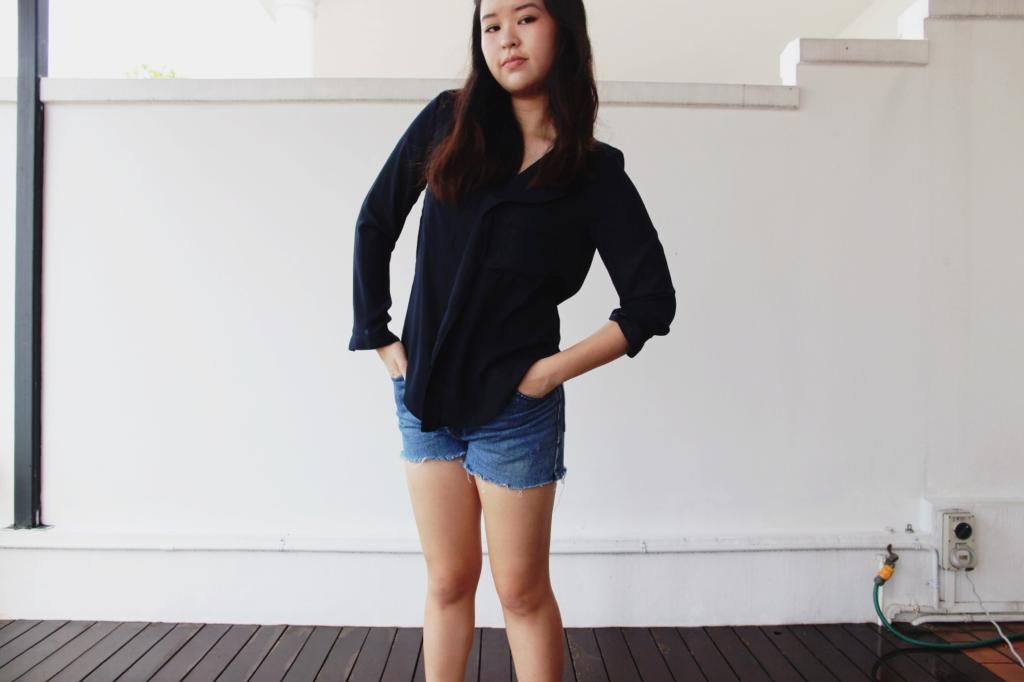
 photo 2A7687C5-FE95-4982-9D8B-AC50F0A9A9F3.jpg  photo 1A9F0AE0-4CA2-469A-A0D3-7BDA4272E746.jpg  photo B60247D1-6794-47FB-9C36-F216F3FE39C3.jpg  photo BCF8143E-B86D-4F0B-AFA0-3F07ADDAD2E6.jpg  photo 365805D1-10FF-46FA-9F50-3F354EF79E65.jpg  photo 0EDFC017-C48A-40BE-BD61-A269AC3EA1A2.jpg

Look 2:
Top- Zara, Shorts- Levi (Salvation Army), Shoes- Birkenstock Rio 2

This is my take on the normcore trend although it cuts a fine line between being intentionally boring and actually really dull. I've been wearing variations of this outfit for the past few months now. Maybe it's because I'm trying to take advantage of the fact that "anti-style" style is in and am using it as an excuse to put as little thought into what I wear as possible.  
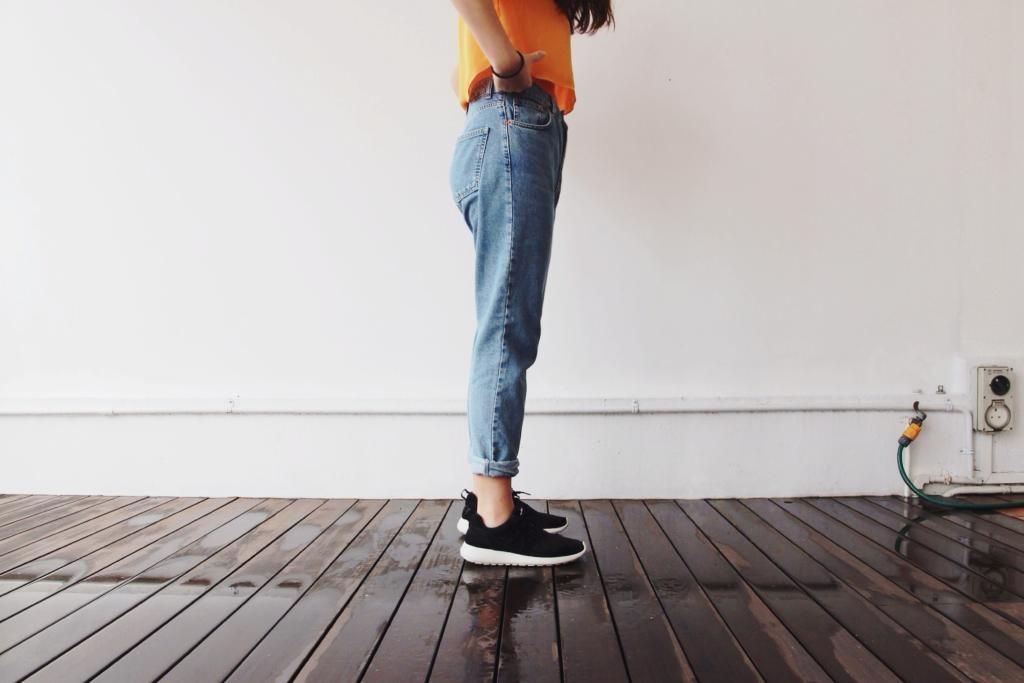
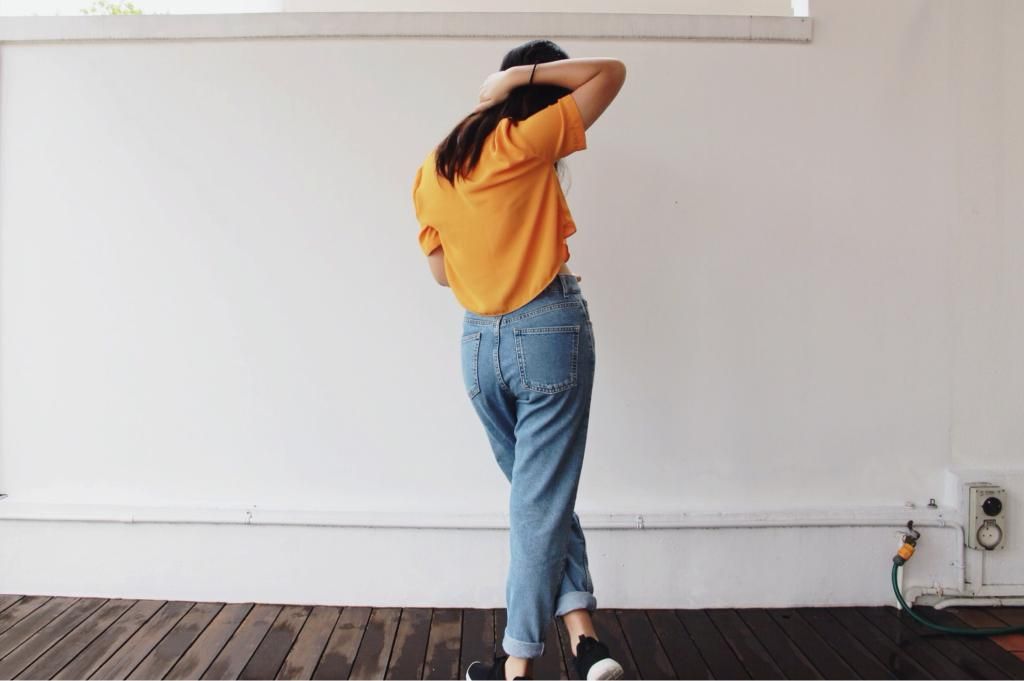
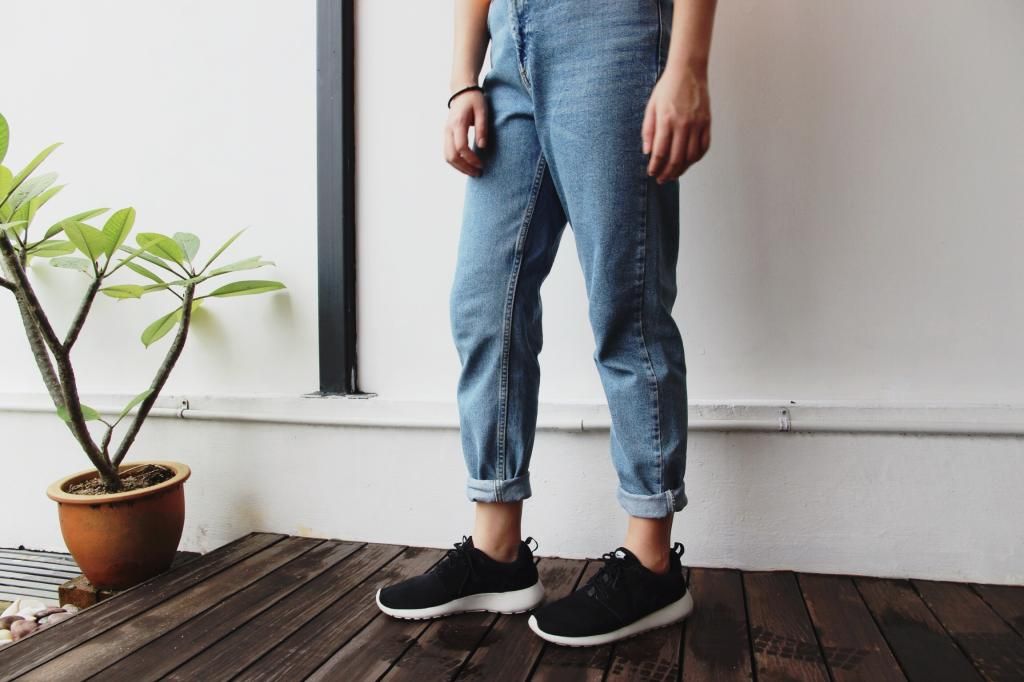
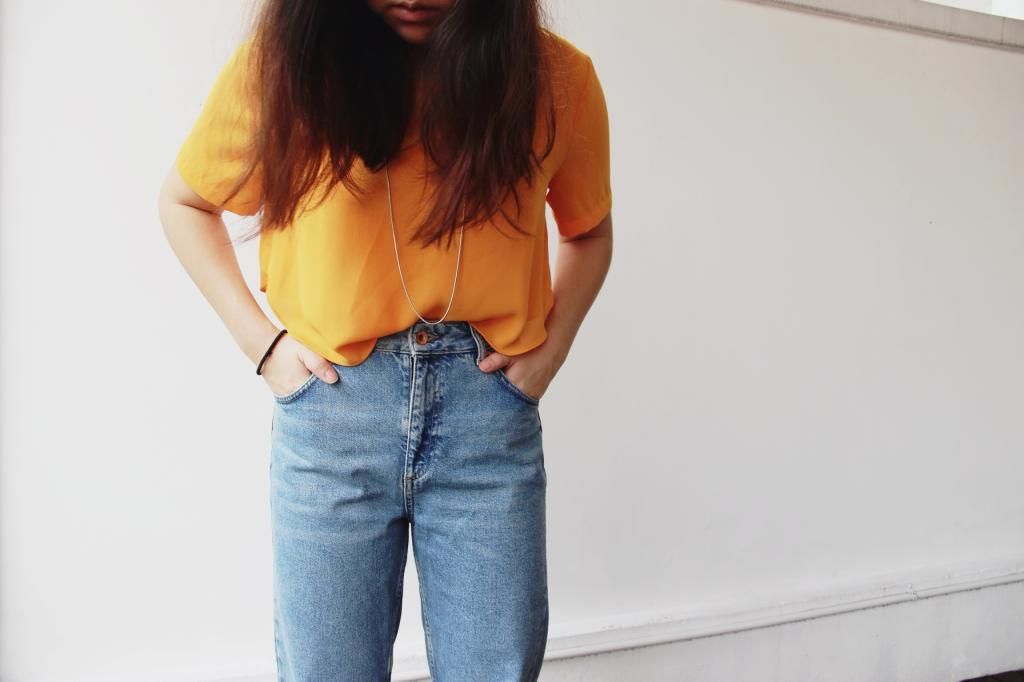
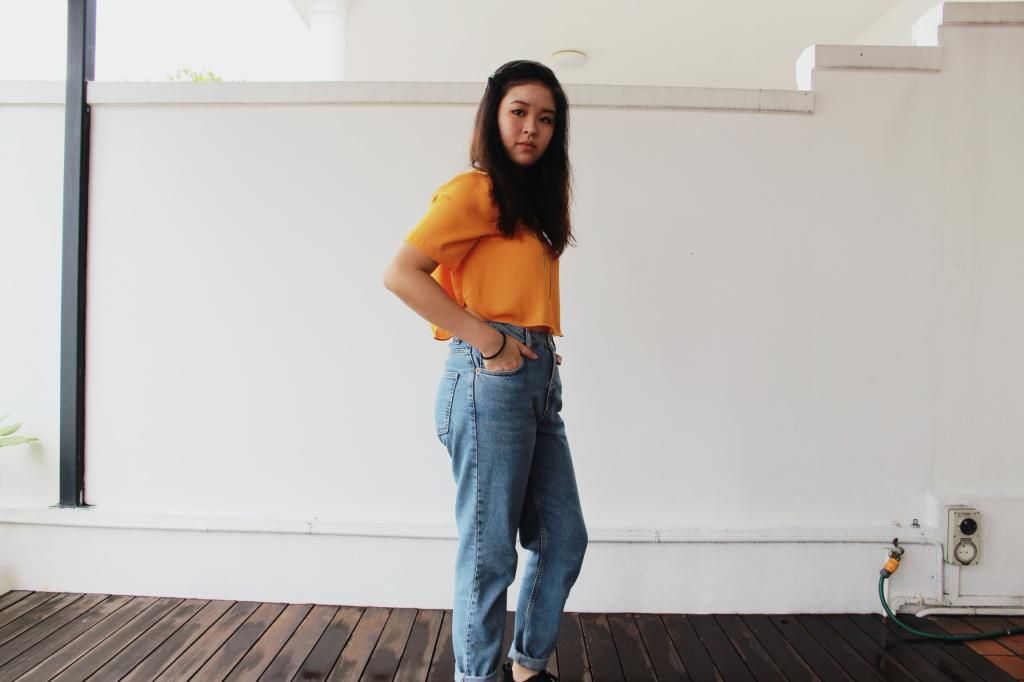
 photo 662A4215-C83D-40C3-B756-F7BC1FDCFDAA.jpg  photo BA587032-9A4C-4EF9-A720-C54D334707C4.jpg  photo AA7D8EC7-5A59-459B-8FA5-995F3C796012.jpg  photo FC39F979-37B8-47A6-9273-B5DFCDFFBA16.jpg  photo 648F6FED-974E-4669-B1BB-B2A0B856D2D3.jpg  photo 1BF65944-B733-45E9-9F81-40C00319CD0B.jpg

Look 3:
Top- TOPSHOP, Jeans- TOPSHOP, Shoes- Nike Roshe Run, Necklace- Forever 21 + DIY

No, your eyes have not deceived you. I am indeed wearing a bright orange crop top. I've been a staunch advocate of monochromatism (in the clothing department) for the better part of the this year as you may have  noticed. However, not even after my dad offhandedly remarked that this top looks like something a monk would wear was I deterred from trying it on (and eventually buying it). This sudden lapse of behaviour could be attested to my latest TV programme obsession, Orange is the New Black. Although they only wore orange for at most 3 episodes, it seemed to have left me subconsciously trying to emulate a prison inmate.